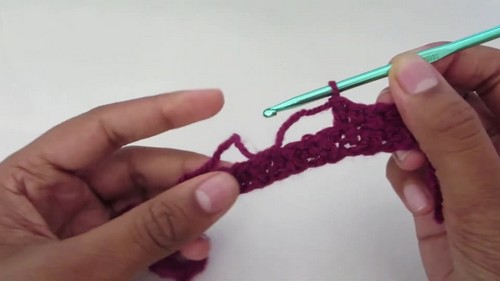
Let’s create a simple Crochet Twist Top together, this project is great for beginners and adds a fun twist to your wardrobe. With some basic crochet skills and a few materials like yarn and a crochet hook, you can make a cool, self-made top. It’s perfect for warm days or casual events, and wearing something you made yourself is always a special feeling.
Simple Crochet Twist Top

Materials:
- 4 mm crochet hook
- Yarn of your choice (suitable for a 4 mm hook)
- Darning needle for sewing
- Safety pins or a stitch marker
Pattern

Step 1: Creating the Panels
- Start by making a slipknot.
- Chain 35 (or more if you want a longer top, just ensure it’s an odd number) with a 4 mm hook. This will be the height of your top.
- Turn your work 90 degrees.
- Insert your hook into the second stitch from your hook, yarn over, and pull through, then yarn over and pull through the two loops on the hook (first single crochet).
- Yarn over, insert the hook into the next stitch, yarn over and pull through, yarn over and pull through two loops, yarn over and pull through the remaining two loops (first double crochet).
- Repeat the pattern (single crochet, double crochet) to the end of the row. This stitch pattern is known as the lemon peel stitch.
- At the end of the row, chain one and turn your work.
- Repeat the single and double crochet pattern until you have completed around 40 rows (or as many as needed for your desired size). This completes one panel.
Step 2: Creating the Lace-Up Back

At the end of your panel, start the lace-up back by single crocheting three.
- Chain one, skip the next stitch, and insert your hook into the following stitch for another three single crochets. This creates the holes for lacing.
- Repeat the pattern across the end of the panel.
- Chain one and turn your work, single crocheting all along the row.
- Create a second panel following the same steps.
Step 3: Assembling the Top

Fold each panel in half to find the center, marking it with safety pins or stitch markers.
- Line up the edges of the panels, ensuring the right sides are together, and the lace-up back is on the outer sides.
- Pin the edges together to prepare for sewing.
- Using a darning needle and yarn, sew the pieces together with a blanket stitch (or any strong stitch that you prefer).
Step 4: Making the Tie

Create a slipknot and chain to a length of approximately 100 cm or longer as you prefer.
- Use this chain to lace up the back of the top through the holes you created earlier.
Step 5: Adding the Straps

Mark the position for the straps using stitch markers or safety pins.
- For each strap, create a slip knot, attach yarn with a single crochet at the marked position, and then single crochet three.
- Chain one and turn your work, then single crochet three again.
- Repeat until the strap reaches your desired length.
- Sew the end of the strap to the back of the top, ensuring it's not twisted.
Finishing Touches
- Secure all loose ends with your darning needle, weaving them into your work.
- Cut off any excess yarn.


